The first major outing of 2012 was to Event City, close to the Trafford Centre on the outskirts of Manchester. A large two day show, entirely under cover, which sounded very attractive so early in the season. Of course, the weekend chosen, the 24th & 25th of March, turned out to be the warmest we would have for some time, with temperatures well into the twenties. The requirement to be in place on Friday evening and remain in place until late Sunday afternoon meant that a "support vehicle" was needed to get us home for some much-needed sleep.
The car was duly parked in its space in the hall, between a Sunbeam Stiletto in "better than new" condition and a car much more to my taste - a Brough Superior.
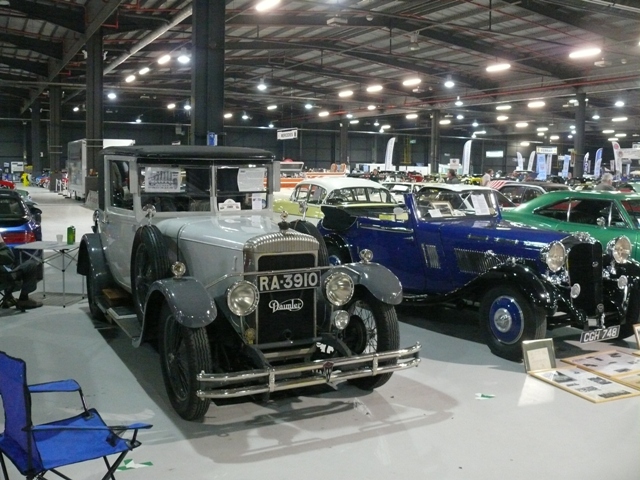
We were awarded a plaque for bringing such a rare car to the show, as was the owner of that very nice Brough.
However, during one of the many demonstrations of the magical window mechanism used by Sanderson and Holmes, disaster struck. The cables attaching the bottom of the pane of glass to the spring-loaded cylinder used to raise it without the need for further effort gave way. We used the piece of wood we use as a dipstick for the fuel tank (no petrol gauge on our dashboard) to wedge the window closed overnight.
The mechanism, also used by other high quality coachbuilders, is simple to use. A small handle is attached to on the top edge of the door glass. To open the window, you just pull down the handle. At the required position, you just let go. A brake is automatically applied, and the glass stays there. To close the window, you raise a small lever below the centre of the opening. The glass moves upwards without any effort on the user's part. No winding handle, and no electric motor needed. A little catch means that the brake can be locked on with the window in any position - including fully closed. Internally, the mechanism is very much like a roller blind.
I drove home with the window open - no hardship given the warm day. The following weekend investigation began.
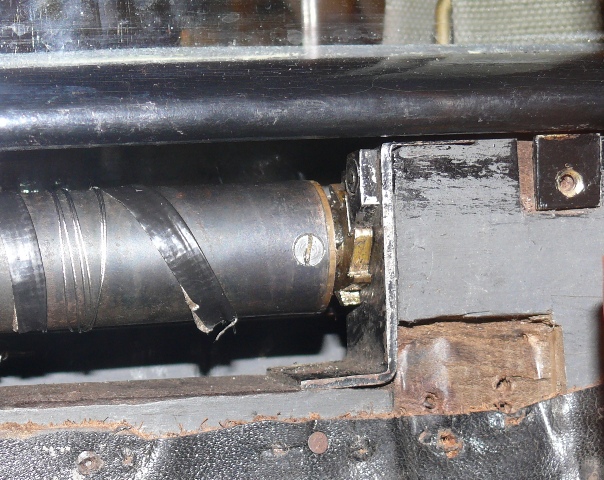
With the door capping loosened, the mechanism can be seen. The flexible cables were fished out.

With the glass lifted and wedged, the remains of the hooks on the glass framing can be seen.

There were two of these hooks, one on each side, and the inward-facing part of each had broken off. Unfortunately, it was that inward-facing part which was needed to locate the bottom ends of the cables, which then wind helically onto the steel cylinder as the window rises.
The first task was to source replacement cable. The original was a flexible, stranded steel cable about 1mm diameter, with a fabric covering. The local DIY chains stocked only much stiffer cable, of the sort used as a security cable on their displays of power tools. I also considered cycle brake cable.
The internet threw up an alternative. Craft suppliers had special beading cable. One, made of 19 strands of stainless steel and then nylon coated, was 0.6mm diameter. It was billed as being extremely flexible, and a close-up of the label showed it had a breaking strain of 25kg. As our mechanism has two support cables, I reckoned that we would be well inside safety limit with this. I went to the nearest stockist and grabbed a 10m reel.
So how to re-attach the cable? Tying a knot around the remains of the hook did not give a satisfactory level of security. A rethink gave me an answer. Tying a cable around one hook, then going to the other and back gave a resonable foundation. With the aid of a pair of tweezers, I managed to tie a reasonable knot down that gap you can see in the photo above, giving me three strands between the two hooks.
Looping a pair of cables round this group of three, I coiled the loose ends around the cylinder, eventually fastening the loose ends, into which I had already tied appropriate loops, to the cylinder ends with the original screws.

The screw in the frame on the left-hand side allws the roller to be moved towards the glass or away from it, so adjusting the brake. Carefully lowering and lifting the glass allowed me to adjust the windings on the cylinder to a cleaner spiral pattern. Now came the time to raise the tension. Over on the right-hand side you can see a ratchet:
By pushing the brass teeth on the mechanism round, the internal spring is wound up, the pawl needs to be pushed towards the wheel by hand, otherwise the spring will unwind in no time, as it did on me early on. I made sure to push properly after that!
Slowly, the tension increased. Soon the glass would stay in place without sinking completely into the frame. Shortly afterwards it was four inches from the top of the frame. Eventually, after a couple of breaks to regain my strength, the glass rose properly again. I bet that Sanderson and Holmes had a special tool to make the job much easier.
Three months later, my knot unravelled. This time, I soldered an electrical ring connector to each cable. After testing carefully that they were properly fixed, the rings were manoeuvred over the remains of the hooks on the window frame, with epoxy resin to hold them in place.